
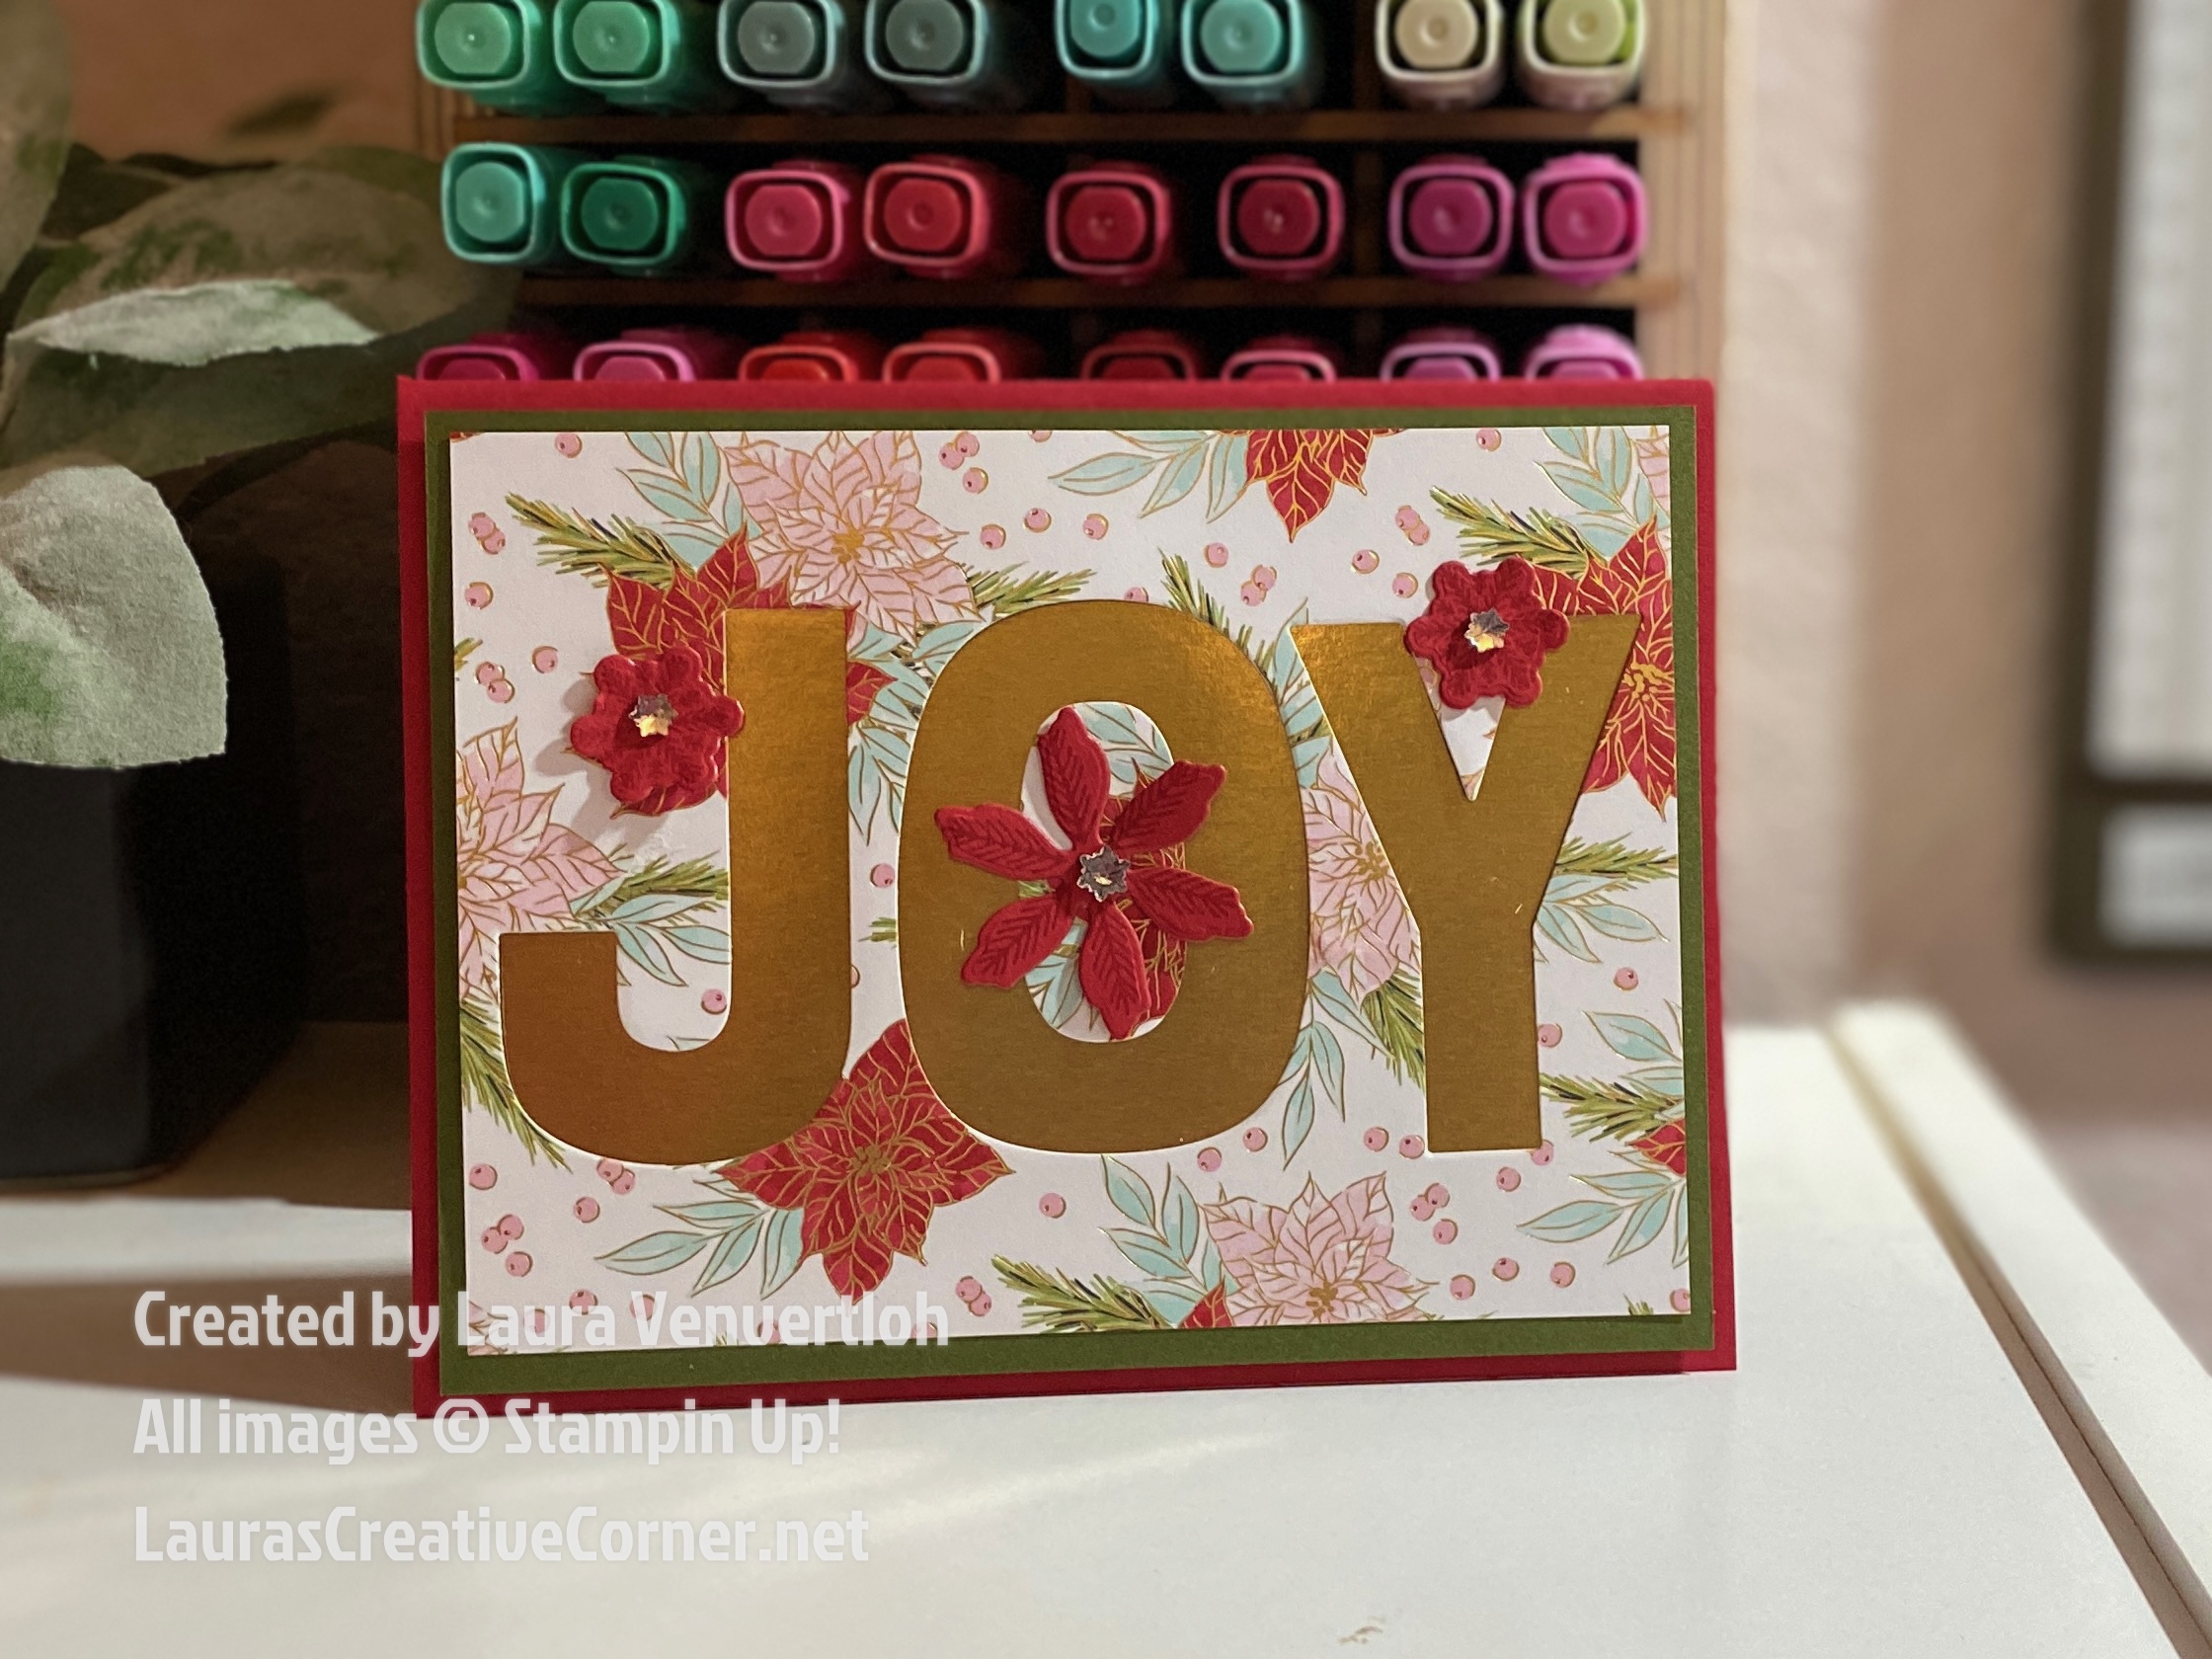
The Party Alphabet Dies make it easy to personalize cards, scrapbook pages, banners, and so much more! With every letter from A–Z plus accented characters for French, German, and Spanish crafters, these dies offer endless creative possibilities. Today’s project shows you how to use the negative from the die cuts to create an elegant holiday card!
Supplies
- Party Alphabet Dies
- Traditions of Christmas DSP
- Delicate Pines DSP
- Delicate Pines Dies
- Gold Foil
- Cardstock of your choice
- Repositionable tape
- Stampin’ Cut & Emboss Machine
- Adhesives
Measurements
- Card Base: 8-1/2″ x 5-1/2″ (scored at 4-1/4″)
- Mat Layer: 4″ x 5-1/4″ (Use to cut out floral/snowflakes for the front of the card)
- DSP (with JOY cut-out): Sized to fit your mat
- Gold Foil Backer: 2-1/2″ x 4-7/8″
- Basic White: 5 1/4 x 4 for the inside
Instructions
1. Prepare Your Die-Cut Negative
Die cut the letters J O Y using the Party Alphabet Dies.
- Line up the letters on your cutting plate.
- Secure with repositionable tape to keep them perfectly straight.
- Run through the Stampin’ Cut & Emboss Machine.
👉 IMPORTANT: Don’t forget to save the center of the “O”—you’ll need it when assembling the negative space!
Place the die-cut letters aside… they’re perfect for another project!
2. Build the Negative Window
- Position the DSP with the JOY cut-outs over your Gold Foil piece (2-1/2″ x 4-7/8″).
- The shimmer peeking through the negative letters adds instant holiday elegance!
- Adhere this panel to your coordinating 4″ x 5-1/4″ mat layer, then to your card base.
3. Embellish With Die Cuts
Using the Delicate Pines Dies, cut several of the small snowflake/floral shapes.
- Arrange them around your JOY window for extra texture and detail.
- Add adhesive-backed embellishments or ribbon if desired.
4. Finish & Inspire
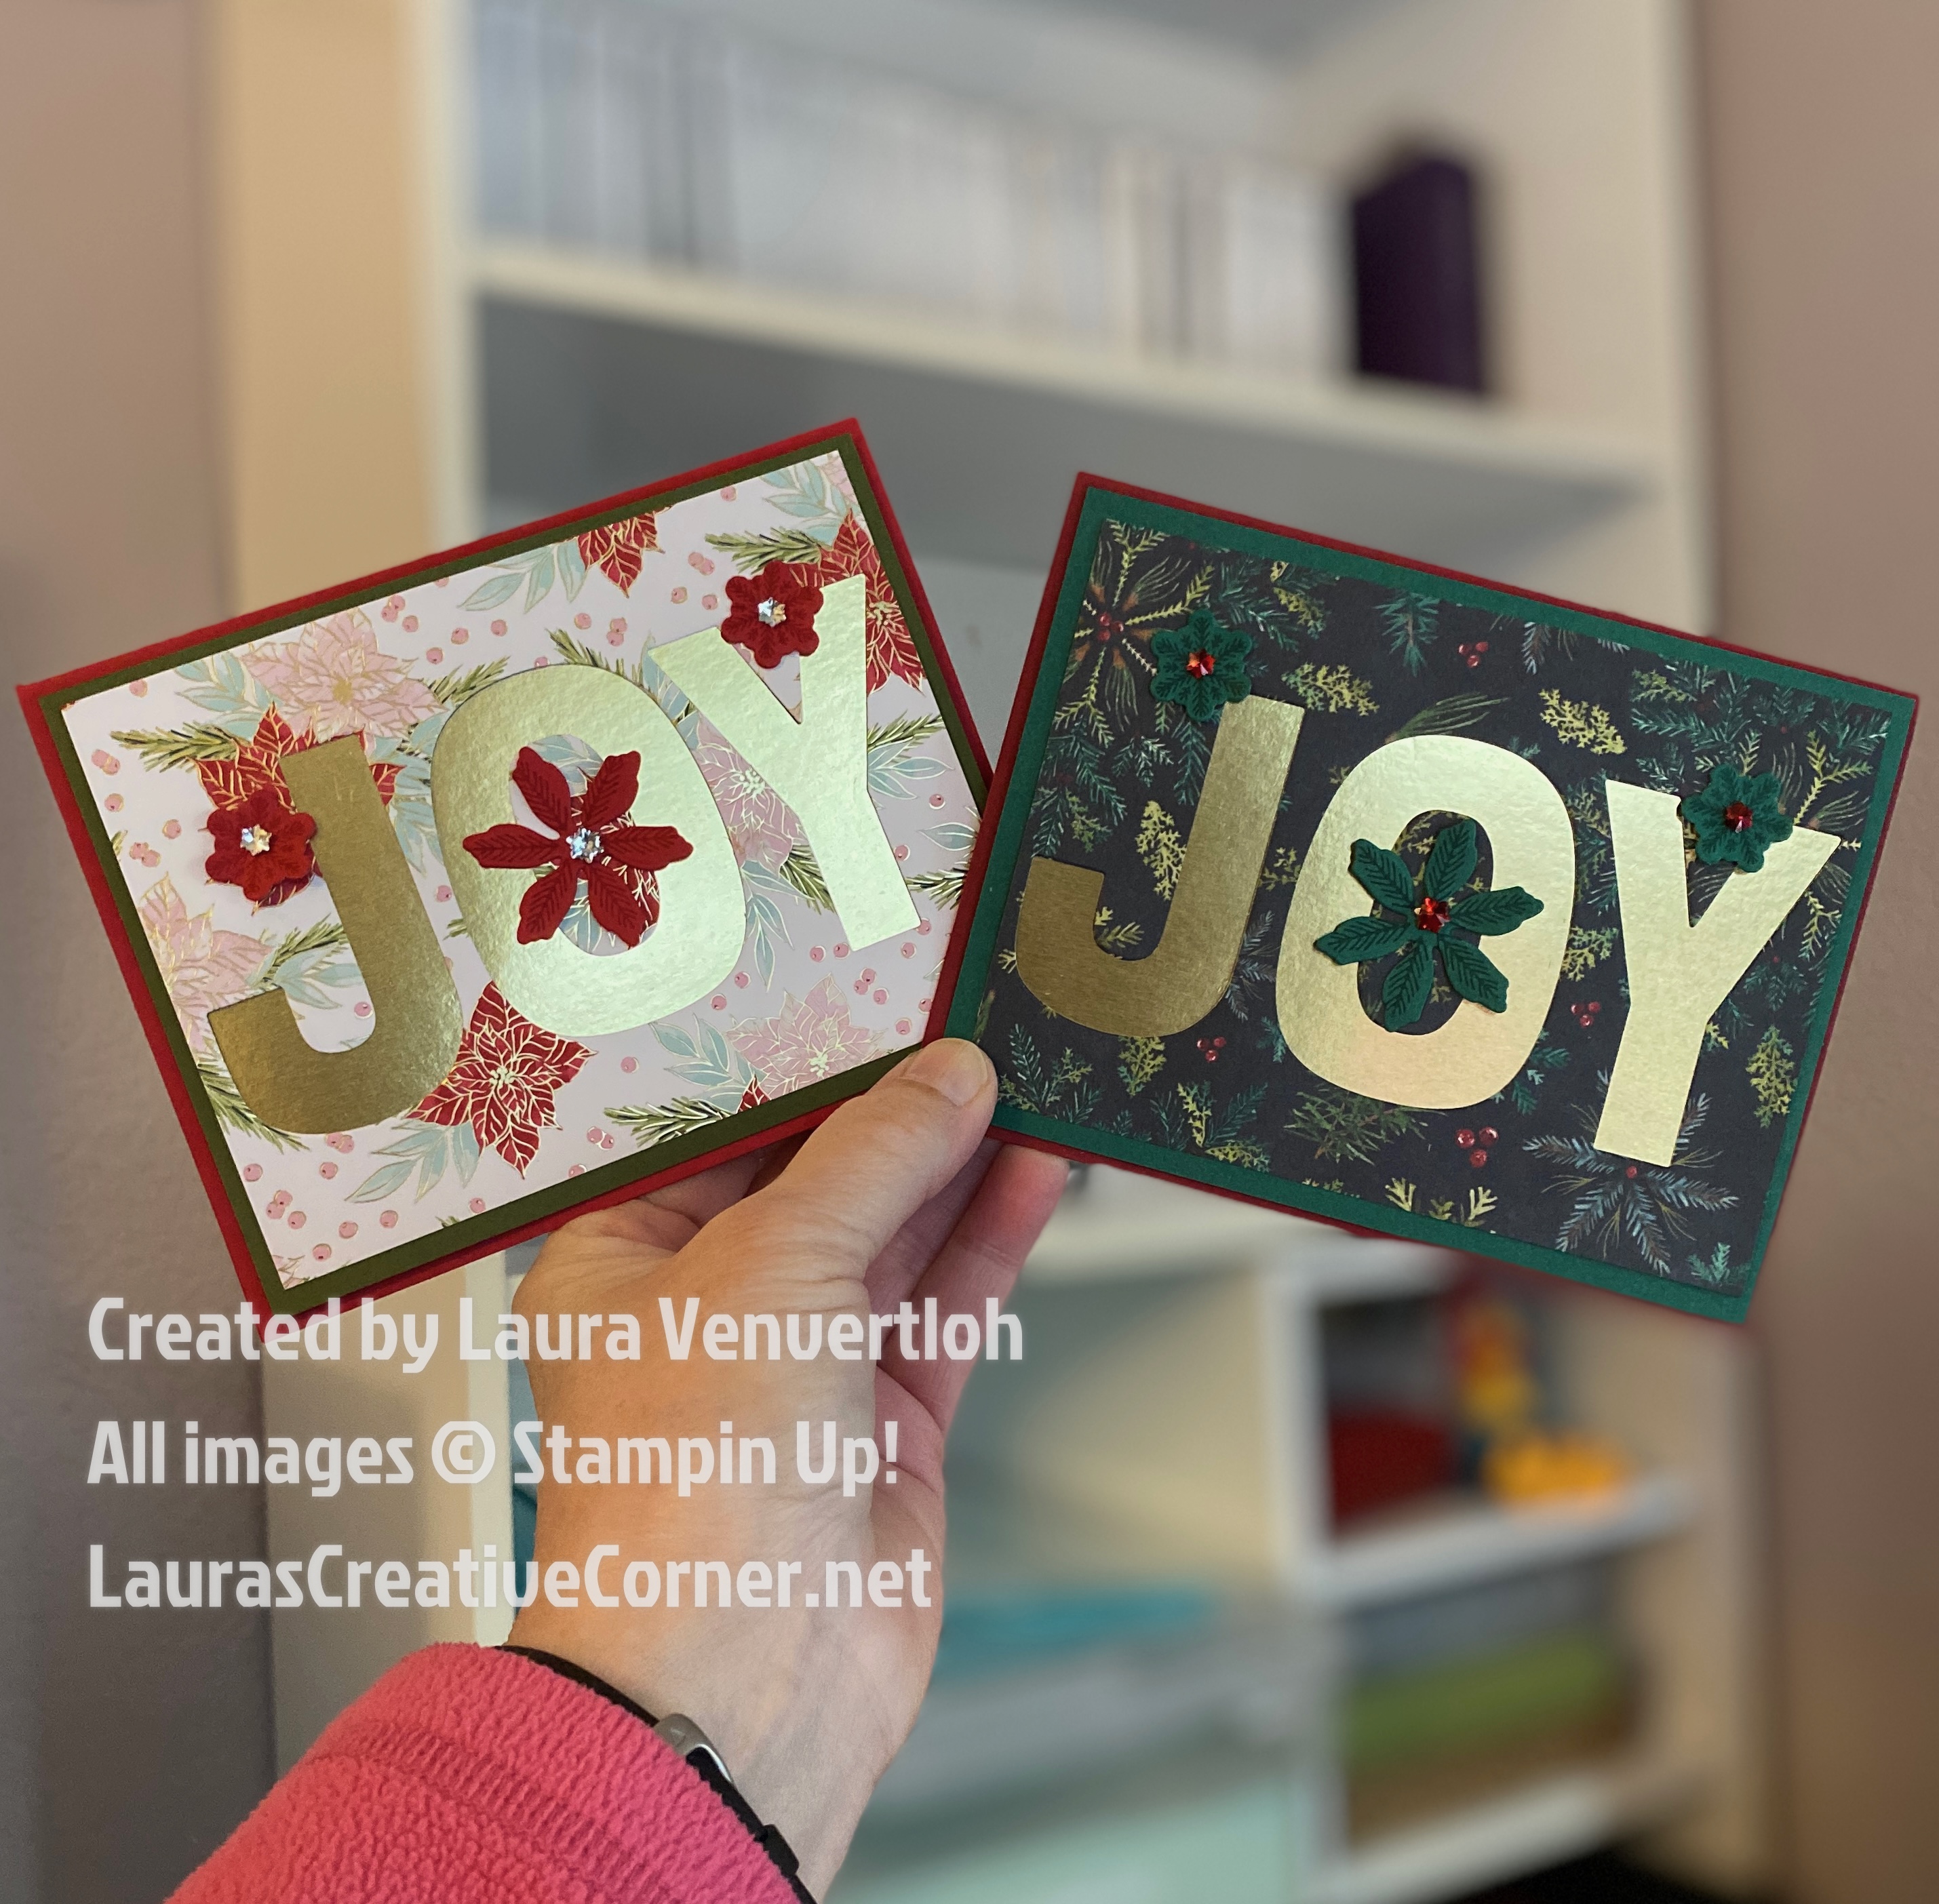
This negative-cut technique is perfect for:
✨ Holiday cards
✨ Winter birthday greetings
✨ Scrapbooking title blocks
✨ Gift tags
✨ Home décor pieces
And the best part—you’ll have the actual J O Y letters ready for a second card! I did!! Here they are!
💌 Stay Connected & Crafty!
- ✉️ Become a VIP Email Subscriber: Get free tutorials, class info, and special offers right in your inbox!
👉 Sign up for my VIP Email List - 🎥 Watch My Latest Videos on YouTube: Tutorials, tips, and crafty inspiration.
👉 Subscribe to my YouTube Channel - 🛒 Shop Stampin’ Up! with Me: Find all the products I use in my projects.
👉 Shop My Online Store - 🌸 Join My Creative Garden Team: Enjoy a discount, community, and tons of inspiration.
👉 Join My Team

![Party Alphabet Dies [ 165263 ]](https://assets1.tamsnetwork.com/images/EC042017NF/165263s.jpg "Party Alphabet Dies [ 165263 ]")
![Elegant Pine Snowflakes 12" X 12" (30.5 X 30.5 Cm) Designer Series Paper [ 166066 ]](https://assets1.tamsnetwork.com/images/EC042017NF/166066s.jpg "Elegant Pine Snowflakes 12\" X 12\" (30.5 X 30.5 Cm) Designer Series Paper [ 166066 ]")
![Traditions Of Christmas 12" X 12" (30.5 X 30.5 Cm) Specialty Designer Series Paper [ 165853 ]](https://assets1.tamsnetwork.com/images/EC042017NF/165853s.jpg "Traditions Of Christmas 12\" X 12\" (30.5 X 30.5 Cm) Specialty Designer Series Paper [ 165853 ]")
![Delicate Pines Bundle (English) [ 166074 ]](https://assets1.tamsnetwork.com/images/EC042017NF/166074s.jpg "Delicate Pines Bundle (English) [ 166074 ]")
![Gold Foil Sheets [ 132622 ]](https://assets1.tamsnetwork.com/images/EC042017NF/132622s.jpg "Gold Foil Sheets [ 132622 ]")
![Real Red 8-1/2" X 11" Cardstock [ 102482 ]](https://assets1.tamsnetwork.com/images/EC042017NF/102482s.jpg "Real Red 8-1/2\" X 11\" Cardstock [ 102482 ]")
![Mossy Meadow 8-1/2" X 11" Cardstock [ 133676 ]](https://assets1.tamsnetwork.com/images/EC042017NF/133676s.jpg "Mossy Meadow 8-1/2\" X 11\" Cardstock [ 133676 ]")
![Shaded Spruce 8-1/2" X 11" Cardstock [ 146981 ]](https://assets1.tamsnetwork.com/images/EC042017NF/146981s.jpg "Shaded Spruce 8-1/2\" X 11\" Cardstock [ 146981 ]")
![Cherry Cobbler 8-1/2" X 11" Cardstock [ 119685 ]](https://assets1.tamsnetwork.com/images/EC042017NF/119685s.jpg "Cherry Cobbler 8-1/2\" X 11\" Cardstock [ 119685 ]")
![Basic White 8 1/2" X 11" Cardstock [ 166780 ]](https://assets1.tamsnetwork.com/images/EC042017NF/166780s.jpg "Basic White 8 1/2\" X 11\" Cardstock [ 166780 ]")
![Faceted Snowflakes [ 166077 ]](https://assets1.tamsnetwork.com/images/EC042017NF/166077s.jpg "Faceted Snowflakes [ 166077 ]")
![Take Your Pick [ 144107 ]](https://assets1.tamsnetwork.com/images/EC042017NF/144107s.jpg "Take Your Pick [ 144107 ]")
