
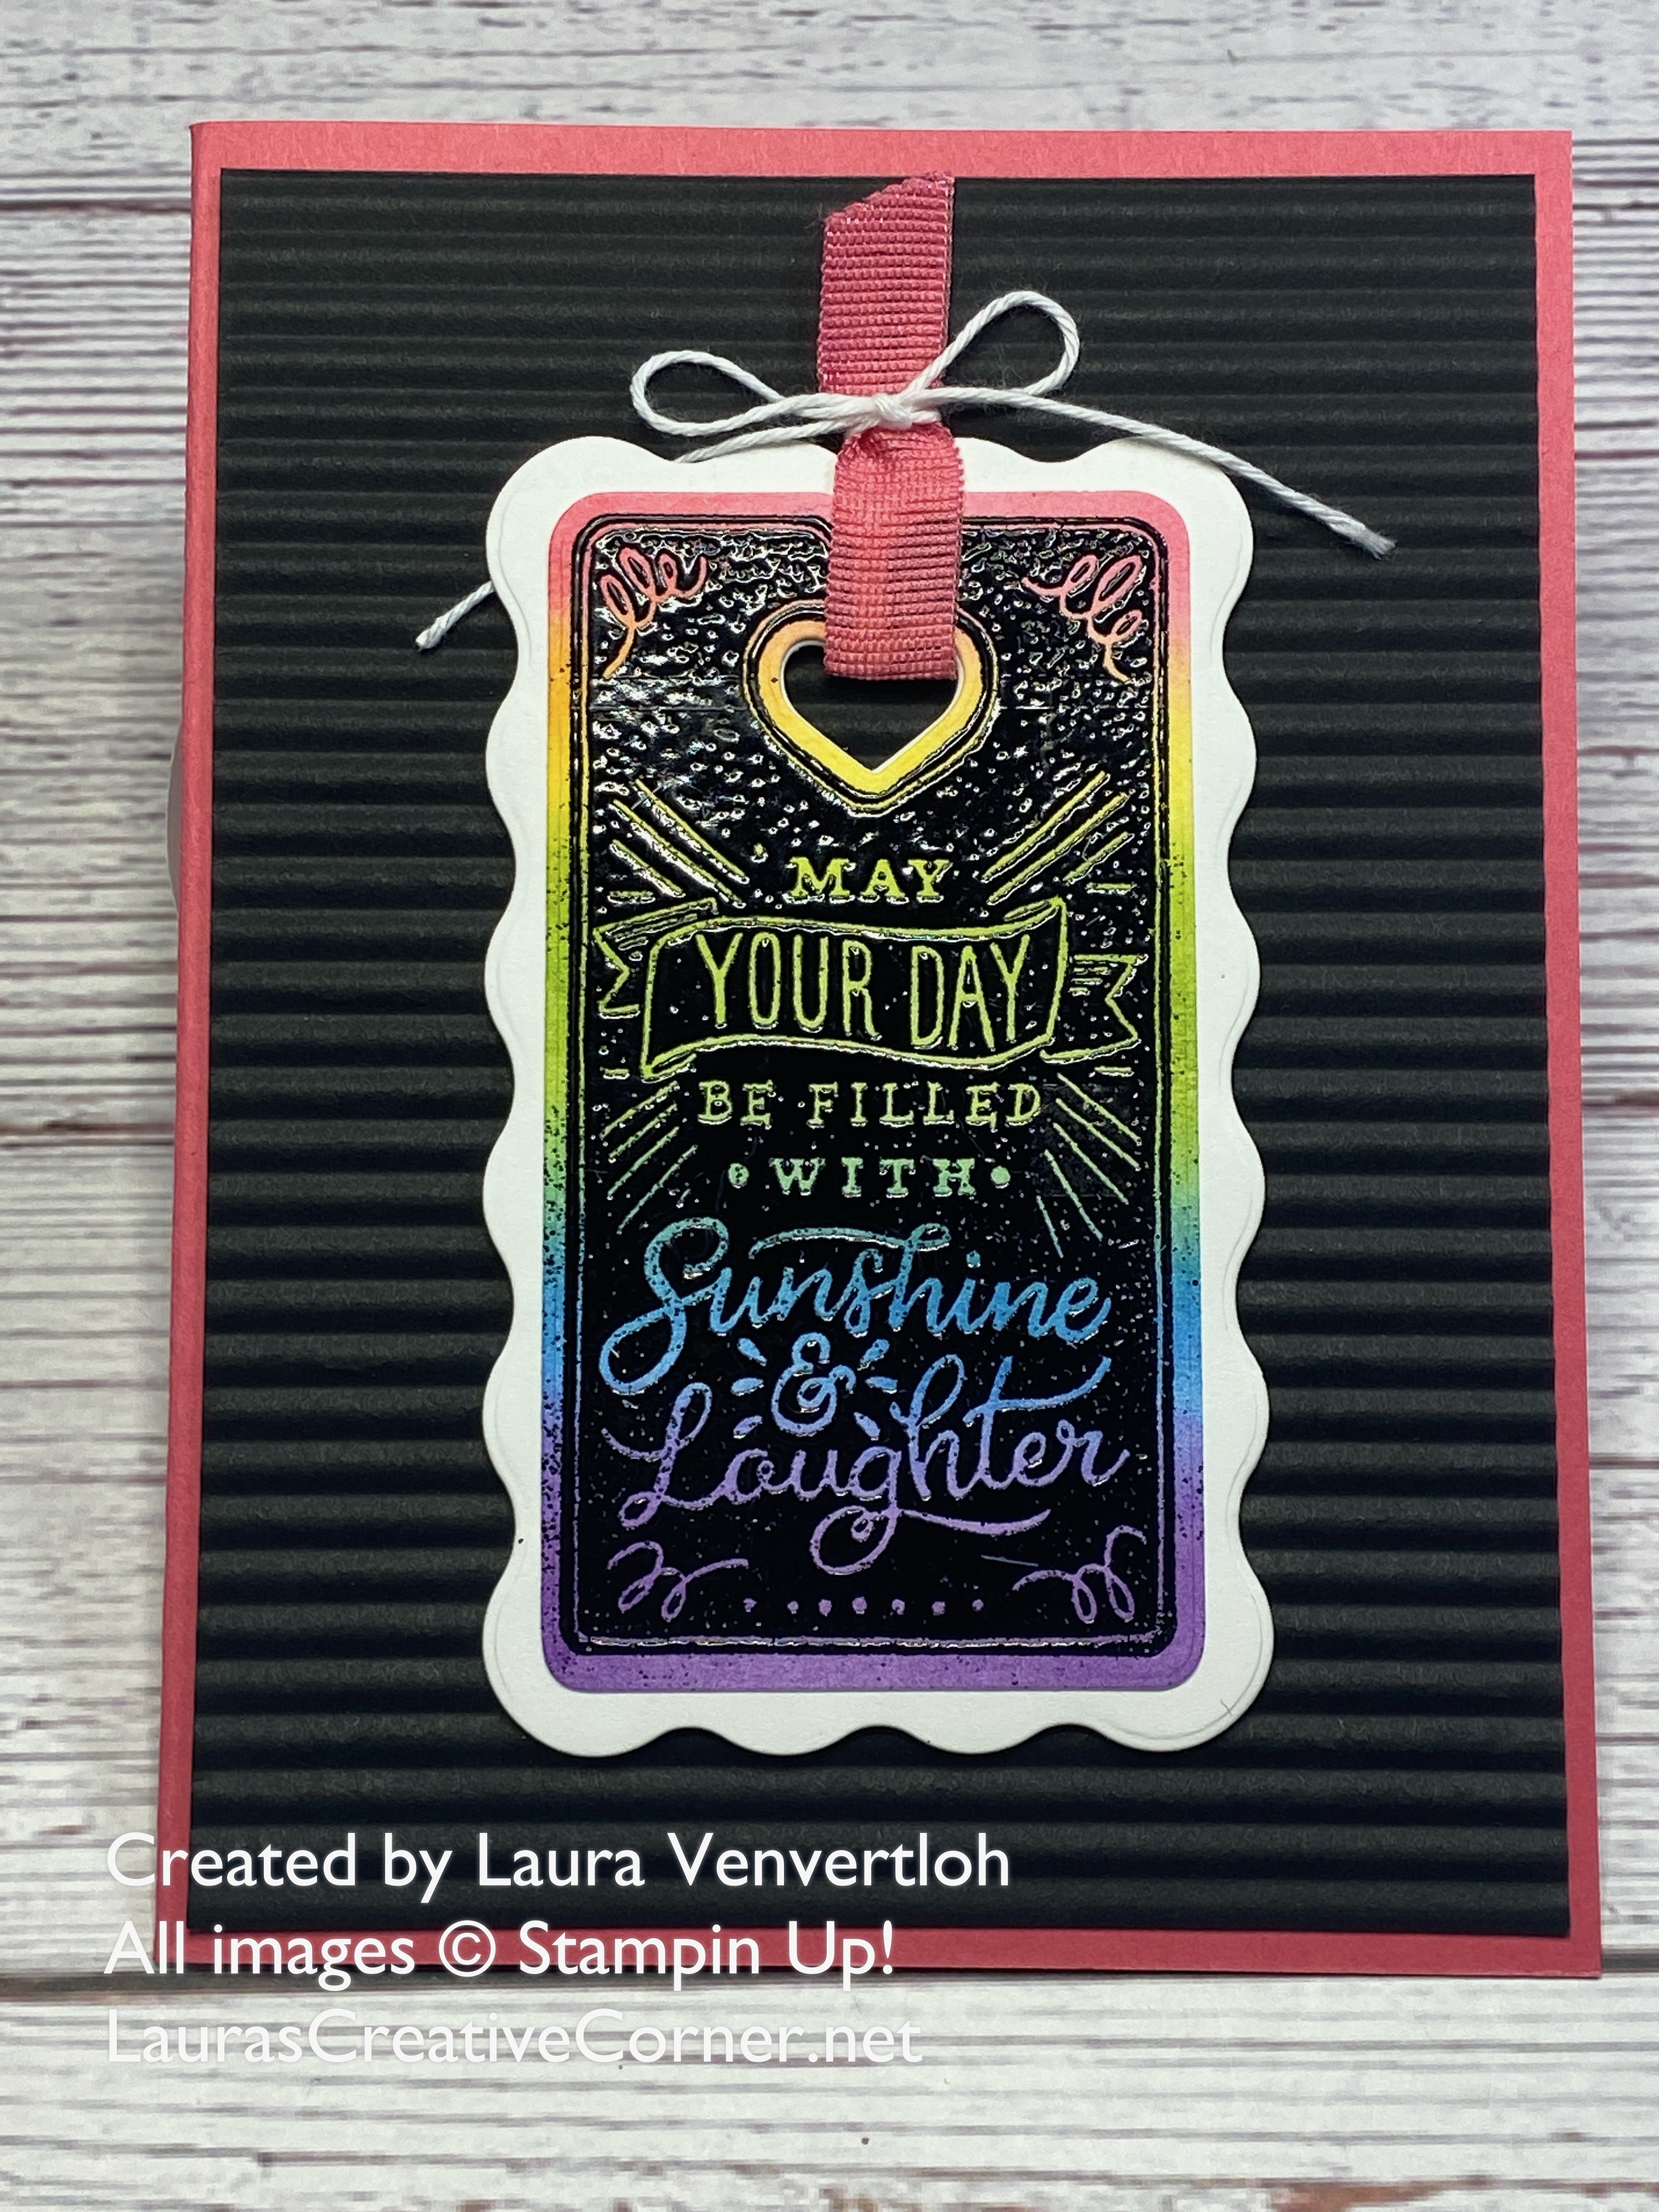
If you love cardmaking and paper crafting with bold colors and wow-worthy effects, today’s project is so for you! We’re combining Strawberry Slush, Granny Apple Green, Daffodil Delight, Gorgeous Grape, Azure Afternoon ink for blending, black embossing, and the fabulous Stampin’ Up! Paper Tags Bundle to create vibrant tags that magically reveal color through your embossed designs.
Here’s how to create this bold, colorful embossed tag design:
- Blend Your Background
Start with a piece of Basic White cardstock and use blending brushes to apply your chosen colors. For this project, I used:- Strawberry Slush
- Daffodil Delight
- Granny Apple Green
- Azure Afternoon
- Gorgeous Grape
- Stamp with VersaMark
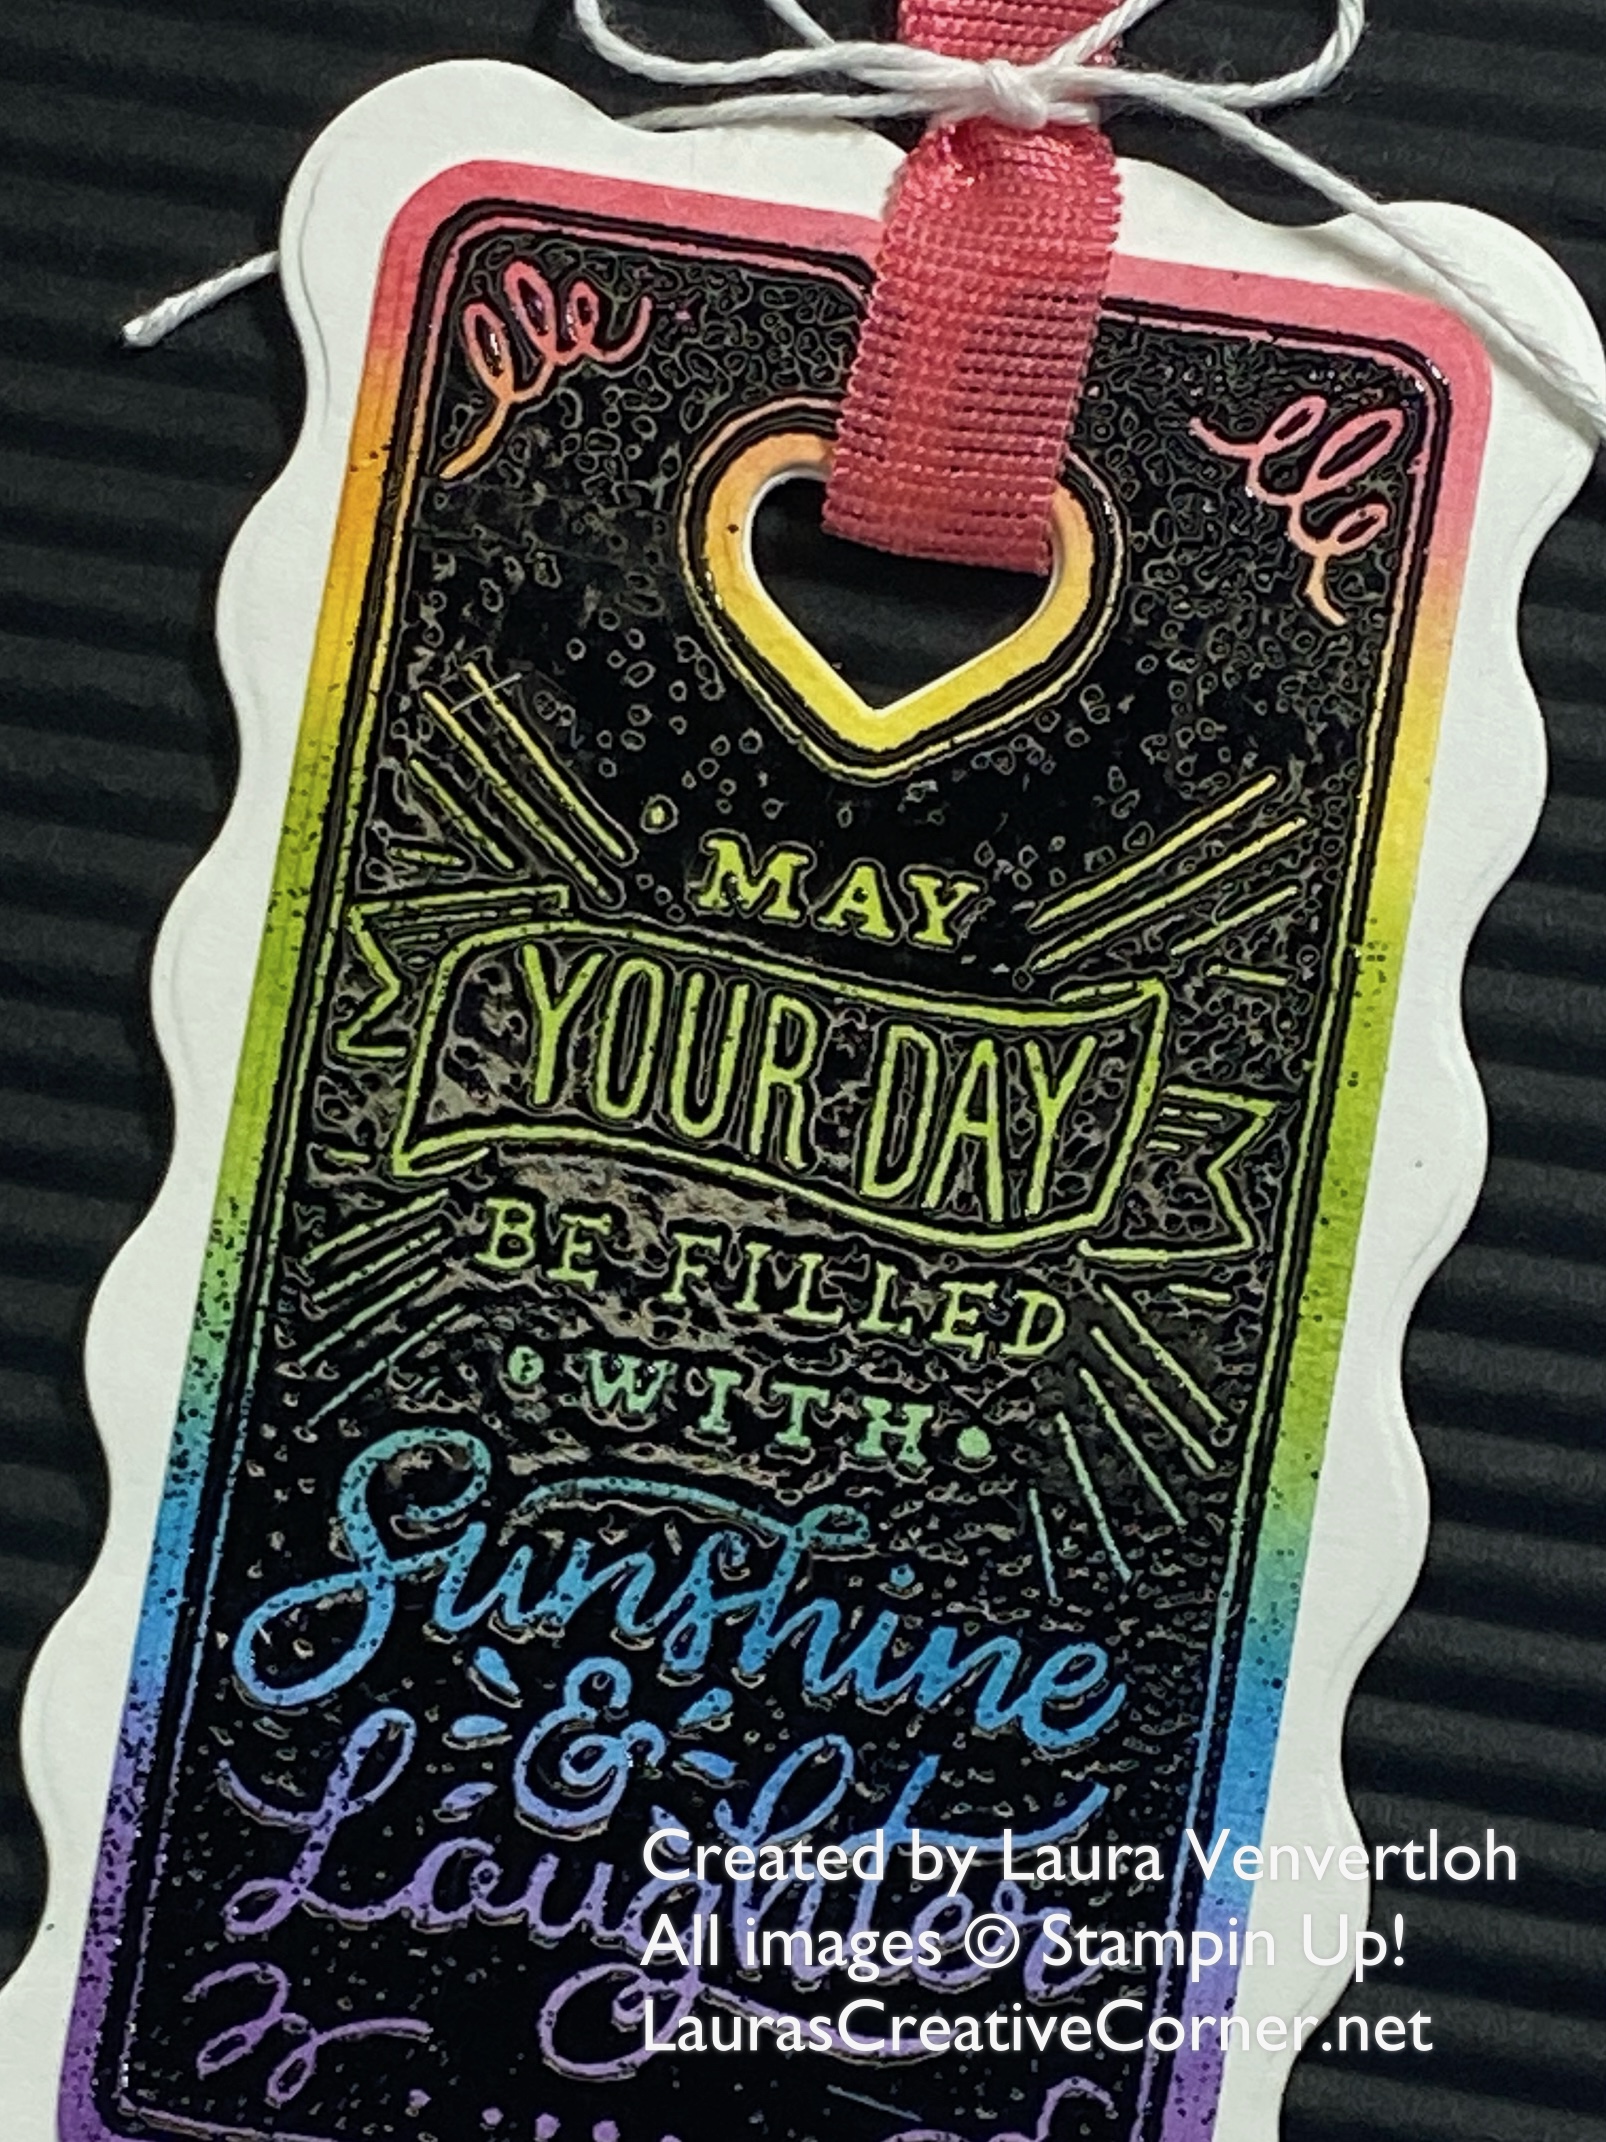
Once your inked background is dry, ink up your tag stamp from the Paper Tags Bundle using a VersaMark Pad. Press the stamp firmly onto your blended cardstock. - Add Embossing Powder
While the ink is still wet, sprinkle black embossing powder over the stamped image. Tap off any excess powder. - Heat Set
Use a Heat Tool to melt the embossing powder until it becomes glossy and raised. This will create a bold black design over your colorful background. - Die Cut Your Tag
Once cooled, use the coordinating dies from the Paper Tags Bundle to cut out your embossed tag. - Assemble Your Card
Layer your finished tag onto a card front made from Basic Black cardstock or another coordinating color. Add embellishments like ribbon or twine to finish it off.
Optional: Run an additional layer through the Mini Corrugated 3D Embossing Folder to add even more texture behind your focal tag!
Whether you’re making gift tags, card fronts, or embellishments, this technique will have you reaching for your heat tool again and again!
🎥 Watch the Tutorial

![Paper Tags Bundle (English) [ 165462 ]](https://assets1.tamsnetwork.com/images/EC042017NF/165462s.jpg "Paper Tags Bundle (English) [ 165462 ]")
![Strawberry Slush 8 1/2" X 11" Cardstock [ 165625 ]](https://assets1.tamsnetwork.com/images/EC042017NF/165625s.jpg "Strawberry Slush 8 1/2\" X 11\" Cardstock [ 165625 ]")
![Basic White 8 1/2" X 11" Cardstock [ 166780 ]](https://assets1.tamsnetwork.com/images/EC042017NF/166780s.jpg "Basic White 8 1/2\" X 11\" Cardstock [ 166780 ]")
![Basic Black 8-1/2" X 11" Cardstock [ 121045 ]](https://assets1.tamsnetwork.com/images/EC042017NF/121045s.jpg "Basic Black 8-1/2\" X 11\" Cardstock [ 121045 ]")
![Strawberry Slush Classic Stampin' Pad [ 165286 ]](https://assets1.tamsnetwork.com/images/EC042017NF/165286s.jpg "Strawberry Slush Classic Stampin' Pad [ 165286 ]")
![Daffodil Delight Classic Stampin' Pad [ 147094 ]](https://assets1.tamsnetwork.com/images/EC042017NF/147094s.jpg "Daffodil Delight Classic Stampin' Pad [ 147094 ]")
![Granny Apple Green Stampin' Pad [ 147095 ]](https://assets1.tamsnetwork.com/images/EC042017NF/147095s.jpg "Granny Apple Green Stampin' Pad [ 147095 ]")
![Azure Afternoon Classic Stampin' Pad [ 161663 ]](https://assets1.tamsnetwork.com/images/EC042017NF/161663s.jpg "Azure Afternoon Classic Stampin' Pad [ 161663 ]")
![Gorgeous Grape Classic Stampin' Pad [ 147099 ]](https://assets1.tamsnetwork.com/images/EC042017NF/147099s.jpg "Gorgeous Grape Classic Stampin' Pad [ 147099 ]")
![Mini Corrugated 3 D Embossing Folder [ 165559 ]](https://assets1.tamsnetwork.com/images/EC042017NF/165559s.jpg "Mini Corrugated 3 D Embossing Folder [ 165559 ]")
![Versamark Pad [ 102283 ]](https://assets1.tamsnetwork.com/images/EC042017NF/102283s.jpg "Versamark Pad [ 102283 ]")
![Heat Tool (Us And Canada) [ 129053 ]](https://assets1.tamsnetwork.com/images/EC042017NF/129053s.jpg "Heat Tool (Us And Canada) [ 129053 ]")
![Basics Wow! Embossing Powder [ 165679 ]](https://assets1.tamsnetwork.com/images/EC042017NF/165679s.jpg "Basics Wow! Embossing Powder [ 165679 ]")
![Strawberry Slush 3/8" (1 Cm) Faux Linen Ribbon [ 165274 ]](https://assets1.tamsnetwork.com/images/EC042017NF/165274s.jpg "Strawberry Slush 3/8\" (1 Cm) Faux Linen Ribbon [ 165274 ]")
![Baker's Twine Essentials Pack [ 155475 ]](https://assets1.tamsnetwork.com/images/EC042017NF/155475s.jpg "Baker's Twine Essentials Pack [ 155475 ]")
